

The Gaucho Life’s Beginner’s Guide to Grilling
Grilling is one of the oldest cooking methods, simple at its core, yet richer than it seems. All you need is fire, smoke, and a little patience to turn a meal into a celebration of fire-kissed flavor, community, and life.
Mastering the grill might bring a little sweat, a few watery eyes when the smoke drifts your way, and yes, it takes some practice. But the payoff is worth it.
Here’s the deal: what follows is your beginner’s guide to grilling, inspired by the land of Argentinian asado and seasoned in the heart of American backyard BBQs.
We’ll walk through the essentials, from choosing your grill and building a fire to marinades and must-know techniques, to help you light your grill with confidence and enjoy the ride.
Ready to fire it up? Here’s your first lesson:
Grills 101: Gas, Charcoal, and Beyond
First things first. The type of fuel your grill runs on shapes the grilling experience and techniques, and the meal’s flavor. The classic choice is between charcoal and gas:
-
Charcoal delivers smoky flavor and a more hands-on, authentic feel. The learning curve can be steeper, but that’s what makes it more rewarding, flare-ups and all.
-
Gas grills offer convenience and precision (just push a button, and you’re cooking!), making up for the lack of smoky depth or the primal thrill of tending fire.
Other options are popping up in U.S. backyards, too:
-
Pellet grills combine convenience with charcoal-like flavor. They burn compressed wood pellets and do a lot of the fire management for you, but sometimes leave a chemical aftertaste.
-
Electric grills take simplicity even further (plug in, set the heat, and cook), but they lack the smoke and ritual of fire cooking.
In brief, gas and electric grills are the most beginner-friendly, even if they can feel a bit like “a stove outside”. Charcoal and pellet grills bring fire, flavor, and heritage into play, though ut they take more time to master.
So, which to choose? Honestly, the one that better fits your style. However, if you’re looking for our two cents… a Santa Maria grill strikes the perfect balance, giving you the thrill of fire-tending with enough flexibility for both newcomers and seasoned grillers.
Pro Tip n°1→ This isn’t the place for the full Santa Maria story, but if you’re curious, we’ve put together a guide on how to choose the best Santa Maria grills. Check it out!

Must-Have Gear for Grilling Success
Choosing a grill that fits your style is only the first step. The second, just as important, is having the right tools.
Why? Because when you’re learning to grill, the right tools are like training wheels: they give you balance and confidence when you feel intimidated (and grilling can get very intimidating when you’ve never done it before).
Here are the must-haves for beginners, curated by Gaucho Life’s team:
-
Long-handled tongs. To flip food without piercing it or risking your fingertips.
-
Spatula. Essential for burgers and anything cooked on a flat iron griddle.
-
Grill brush. For cleaning the grates after every cook (yes, every time).
-
Instant-read thermometer. No more guessing: perfect doneness made simple.
And if you want a little extra help:
-
Chimney starter. The fastest, easiest way to light charcoal.
-
Heat-resistant gloves. Confidence boost for moving hot grates or coals.
-
Grill basket. Great for vegetables or small items that might slip through the grates.
-
Grill cover. Protects your grill from the weather.
Pro Tip n°2→ If you’re using a charcoal grill, an Argentine brasero is key for constant ember production.
Grilling Techniques Every Beginner Needs to Know
Now it’s time to go all in or, as we say in Argentina, poner la carne en el asador (“to put the meat on the grill”). But first:
-
Using a charcoal grill? Make sure you’ve lit it properly. Our Charcoal Grill Guide can walk you through the steps.
-
Using an electric or gas grill? You’re already good to go, keep reading!
In this section, we’ll review some essential grilling techniques every soon-to-be grill master should know:
-
Two-zone grilling
-
Searing & reverse searing
-
The holy trinity: preheating, flipping, and resting food.
Curious about a specific technique that isn’t listed here? Feel free to ask for it in the comments. We’ll be happy to help!
Want to understand these underbelly cuts like a grillmaster? Check out our guide on Flank Steak vs. Flap Meat.
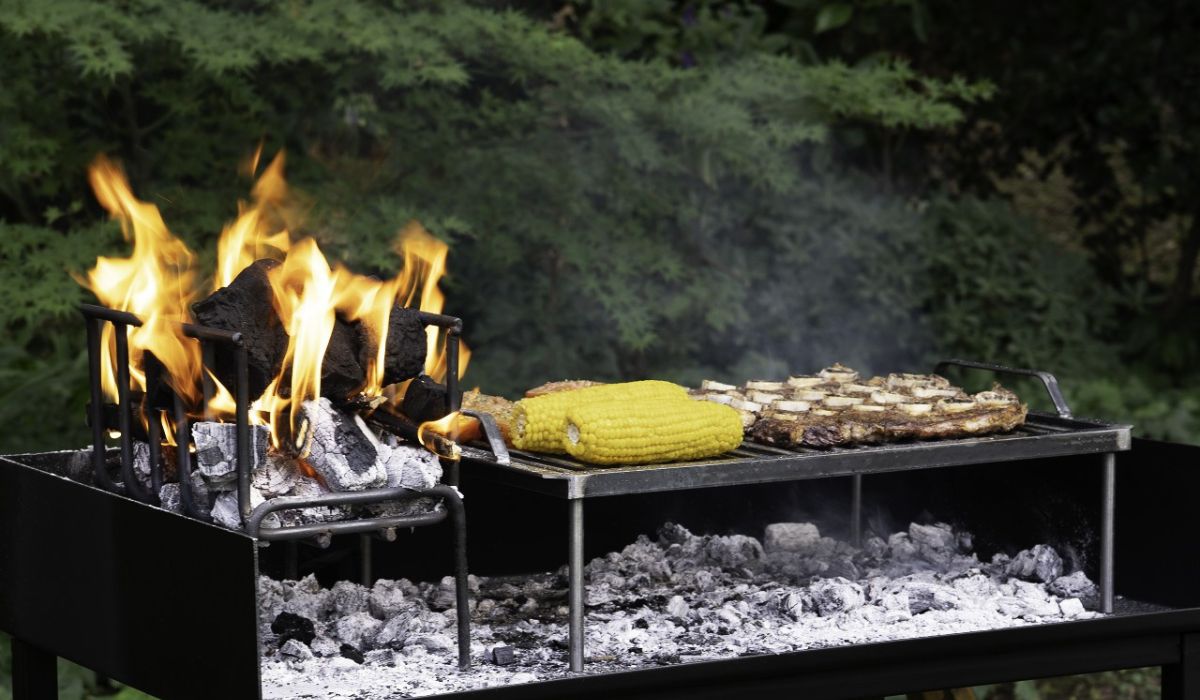
Two-Zone Grilling
Two-zone grilling means creating a hot zone (direct heat) and a cooler zone (indirect heat):
-
The hot zone is perfect for searing and for thin cuts that cook quickly.
-
The cooler zone is great for thicker cuts, slower cooking, or keeping food warm without burning.
On gas and electric grills, you can set up heat zones by turning one burner (or side) on and leaving the other off for direct and indirect grilling, respectively.
If you have a gaucho grill, simply push embers to one side for direct heat, and leave the other side with fewer coals. The same principle applies to every other charcoal grill, although with a Santa Maria grill, you can also raise or lower the grates.
Searing & Reverse Searing
Searing produces a crisp crust that helps to lock in juices and flavor with a quick blast of heat. This makes it ideal for thin cuts or soft veggies. To do it:
-
Set up a two-zone grill.
-
Place food over the hottest part of the grill.
-
Let it sizzle for a short time, until a caramel-brown crust forms.
-
Flip it, and repeat.
-
Move to the cooler zone to finish without burning.
For thicker cuts, however, a reverse searing provides a safer approach, preventing burned spots or overcooking. You just have to flip the order. Start on the cooler side, cooking gently until nearly done. Then move to the hot zone for a crusty, deep-gold finish.
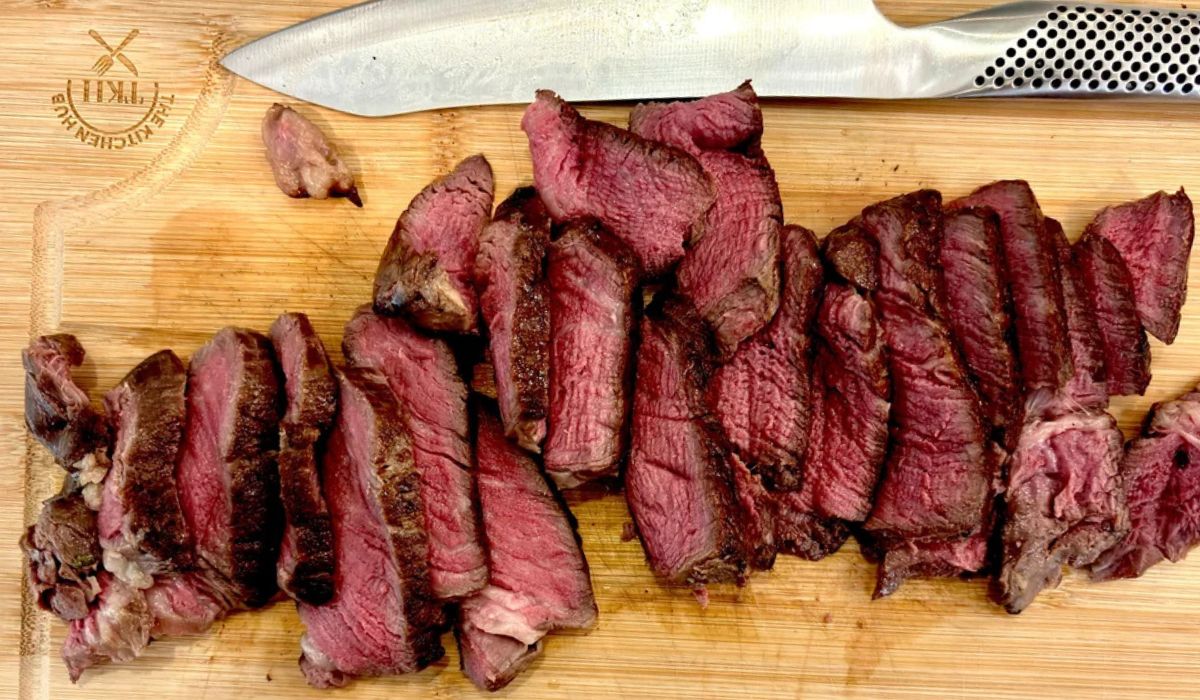
Preheat, Flip, and Let It Rest
Even the best quality grills don’t live up to their name if you don’t preheat them before placing the food. Give your grill 10-15 minutes to heat up. Hot grates will help food release cleanly, make better char marks, and ensure even cooking.
For a juicy result, use tongs for flipping the food, or a spatula for delicate items. Avoid forks and knives, as piercing the meat lets juices escape.
Finally, after cooking, let the meat sit 5-15 minutes before slicing. This allows juices to settle back inside, so your plate gets juicy food, not a puddle on the cutting board.
| Food | Grill temperature | Cooking time | Grilling technique | Internal temp |
|---|---|---|---|---|
| Ribeye (1–1.5 in.) | 450–500°F (hot zone) | 4–6 min per side | Searing. If thicker, reverse sear | 135–145°F (medium) |
| Skirt steak | 450–500°F | 2–4 min per side | Direct sear (quick cook) | 130–135°F (medium rare) |
| Chicken thighs (bone-in, skin-on) | 350–400°F hot zone / 200–250°F cool zone | 6–8 min direct sear, then 10–12 min indirect | Two-zone grilling | 165°F |
| Chicken breast | 450°F | 6–8 min per side | Direct grilling | 165°F |
| Chorizo sausage | 350–400°F | 12–15 min per side | Direct grilling, turning occasionally | 160°F |
| Eggplants (halved or sliced ½ in.) | 375–400°F | 4–5 min per side | Direct grilling | Until tender/charred |
| Onions (½ in. slices or halves) | 350–375°F | 4–5 min per side | Direct grilling | Until caramelized |
| Summer squash (½ in. slices) | 375–400°F | 3–4 min per side | Direct grilling | Until tender/charred |
You may also like: Learn how to grill picanha like an Argentine asador and elevate your BBQ game.
Of Rubs, Marinades, and Sauces
While good meat often does just fine with little more than salt, proper seasoning sets the foundation for flavor in most BBQs. Basic seasoning techniques include:
-
Rubs. Usually dry (sometimes lightly oiled) blends of herbs and spices. Rub them generously over the food about an hour before grilling.
-
Marinades. Liquid mixtures that soak into the meat while tenderizing it. They typically include herbs, spices, and something acidic, like vinegar, wine, or lemon juice.
-
Sauces. The finishing touch. Some add freshness (chimichurri), others sweetness or spice. In Argentina, chimichurri and salsa criolla are classics at the asado table.
Seasoning is a great way to experiment with flavor and textures. However, here are a few simple rules to keep your food tasting its best, especially if you’re new to the grill:
-
Love sweet flavors? Wait until the last minutes of grilling to add sugary sauces so they don’t burn. (And avoid sugary rubs unless you’re cooking thin cuts.)
-
Brush off extra herbs and spices to prevent bitter, burnt spots.
-
Don’t marinate delicate cuts for too long, or they may fall apart.
-
Before grilling, pat marinated food dry to help it develop a crisp, golden crust.
Pro Tip n°3→ Try Argentine chimichurri. Fresh, garlicky, and herby, it pairs beautifully with ribeye, ribs, and Argentina’s most iconic sandwich: choripán.

Safety & Grill Care Basics
No beginner’s grilling guide would be complete without a few safety must-knows. Here’s our pick:
-
Grills are designed for outdoor use. You can grill under a gazebo or pergola, but you’ll have to make sure it’s fire-safe and has plenty of ventilation.
-
Friends and family love to gather around the fire, but it’s better to draw an invisible boundary around the grill. It keeps kids and pets from getting too close, and lets you grill comfortably.
-
Never walk away. A lit grill, especially charcoal or live-fire, shouldn’t be left unattended. Risks range from a burned meal to a fire hazard.
-
Protect yourself. Long tongs, heat-resistant gloves, and a sturdy leather apron aren’t just extras: they keep burns and flare-ups from ruining your cookout.
-
Always keep a spray bottle of water nearby for small flames, and have a fire extinguisher (or a bucket of sand for charcoal grills) within reach, just in case.
Grill safety goes hand in hand with grill care. Even top-quality grills (such as Gaucho Life’s) can rust or lose performance without proper maintenance. Here’s how to keep yours working like new:
-
Wipe down grates and empty ashes once the grill has cooled to lukewarm. It’s much easier before the grease hardens.
-
Season the grates. A light coat of high-smoke-point oil (like canola) helps prevent rust and creates a natural non-stick surface. This is especially important with cast iron.
-
Store your grill in a dry spot with a weather-resistant cover. Even stainless steel isn’t invincible against constant sun, rain, or snow.
Pro Tip n°4→ Want to dive deeper? Check out our guide on how to keep grill grates from rusting.
Quick Start Recipes
Ready to put your new skills to work? Here are some simple, beginner-friendly recipes you can try.
Grilled Steak
-
Choose a nicely marbled steak, about 1-1.5 inches thick.
-
Preheat the grill to 450–500°F or use the hand test: hold your hand 5 inches above the grates. If you can hold it up for 5-7 seconds, it is perfect.
-
Lightly brush the grates with oil or use some of the steak’s fat cap.
-
Place the steak on the hot zone. Let it sear without moving.
-
When juices start pooling on top, flip and season with salt.
-
Remove the steak when it’s browned on both sides. Let it rest 5 minutes before slicing so the juices redistribute.
Grilled Chicken Thighs
-
For an extra flavorful BBQ grilled chicken, coat thighs with a spicy rub 30 minutes before grilling, or soak them in a brine for extra tenderness.
-
Set up two heat zones: 350-400°F for the hot zone, 200°F for the cooler zone.
-
Sear thighs over direct heat for a few minutes.
-
Move to the cooler zone.
-
Continue grilling 6-8 minutes per side, basting lightly with brine or sauce for extra juiciness.
-
Check that the internal temperature reaches 165°F before removing from the grill.
-
Let rest 5 minutes before slicing.
Chorizo Sausage
-
Preheat grill to medium (350-400°F).
-
Place the chorizo sausages on the grill, leaving the casing on.
-
Cook about 12 minutes per side, turning with tongs to keep juices inside.
-
Serve hot with bread and chimichurri for a classic choripán-
Pro Tip n°5→ Looking for a lighter, plant-based option? Try BBQ vegetables. The same techniques apply, and the flavor is fantastic.

Why Argentinian Santa Maria Grills Stand Out for Beginners
At Gaucho Life, we’re longtime fans of Santa Maria grills, especially for those just starting their grilling journey. Why? Because they offer a hands-on fire-cooking experience, have an unmistakable charm, and their adjustable grate system acts like a safety net if food starts to scorch.
Our take on the Santa Maria grill comes with an extra advantage that makes it ideal for beginners: V-shaped grates that channel fat drippings away from the embers, helping prevent flare-ups and keeping your cookout under control. Beginner-friendliness at its peak.
We won’t go into all the details here, but if you want to learn more about how to choose the right Santa Maria grill, check out our full guide on the blog. You might discover a few tips and tricks that catch your eye.
Pro Tip n°6 → Looking for the raw charcoal-grilling challenge? A quality Argentine grill could be just the right match to take your skills up a notch. Read our guide on how to choose the best gaucho grills and find the one that’s right for you.
FAQs
Any questions about starting your own grilling journey? Here are answers to some of the most common questions we hear. If yours isn’t here, don’t hesitate to reach out—we’re always happy to help!
What’s the best grill for total beginners?
Gas grills are widely considered the best grills for beginners: they offer precision and control without much guesswork.
If you’d like to try charcoal, a Santa Maria grill is a great option. Its adjustable grate makes temperature management simple, and the open frame design makes cleanup easier.
How do I stop burning or sticking?
To prevent food from burning or sticking to the grates, preheat your grill for at least 10 minutes and lightly oil the grates before adding food.
Keeping the grates clean and oiled regularly also helps prevent sticking and burning.
How do I know when my food is done?
The most reliable method to know when your food is done is an instant-read thermometer. Trust temps, not looks! The ideal doneness depends on the cut and grilling technique.
Do I need fancy gear to get started?
Not at all! You can start grilling with basic tools, but quality gear makes the experience easier and more enjoyable.
At Gaucho Life, our beginner essentials include long-handled tongs, a spatula, a grill brush, and an instant-read thermometer.
Curious about different South American grill styles? Don’t miss our breakdown of Brazilian Churrasco vs Argentine Asado.
Who’s Afraid of Firing a Grill?
At the very beginning, it went something like this: Lightning strikes a mammoth. Charred mammoth smells good. People eat it and want more. Lightning doesn’t strike another mammoth, so humans invent grilling. Millennia pass, grilling gets perfected, but the basics remain the same: fire, iron, and food.
In other words, there isn’t much science to grilling… yet taking the leap and learning how to do it can still feel intimidating. So congratulations! By finishing this guide, you’ve taken that very first step toward becoming a grill master.
The next step? Head out to your backyard and fire up that grill. No grill yet? Explore options (such as our carefully curated grill collection) that suit your style and get ready to start your grilling journey.
Because at Gaucho Life, we know it isn’t only about the grilling. It’s about the lifestyle.

Read more
Charcoal Grills 101: Beginner’s Guide
Charcoal grilling delivers unbeatable flavor and the reward of tending a live fire hands-on. Briefly, it turns even a simple backyard cookout into something memorable, timeless. Getting it right co...
Leer más
The Duel of Wood-Fired Legends: Santa Maria vs. Gaucho Style
Outdoor grilling has been part of humanity’s DNA since the earliest days. Across continents, generations, and cultures, it has evolved into unique traditions of preparing and savoring fire-fueled m...
Leer más
Dejar un comentario
Este sitio está protegido por hCaptcha y se aplican la Política de privacidad de hCaptcha y los Términos del servicio.